One Room Challenge Week 2: Mushroom Paint, Red Sawdust and an Insane Amount of Wood Bleach
Welcome to week 2 of the One Room Challenge! To those of you who are new here, I’m currently part of a design challenge that consists of designing and renovating one space in my home in just 8 weeks! The space I’ve decided to complete is the Holly House Kitchen! Each Wednesday I log on to document my progress and share the fun projects we’ve been up to around here!

Last week, I shared all about the charming kitchen space I’m hoping to fix up and my design plan and mood board.
This week, we hit the ground running with 2 major projects: Refinishing our countertops and repainting our kitchen cabinets + swapping out the hardware.
Our Cabinet Paint Color
I’ve been dreaming of mushroom kitchen cabinets for a few years now. At our old home, I had sampled multiple shades so I knew the direction I was leaning, but I wanted to make sure the color still looked great in the Holly House kitchen.

After not a lot of deliberation, I chose Natural Cream by Benjamin Moore. Natural cream is a stunning, neutral off-white and I’m totally obsessed with how it looks! It leans more beige than grey.
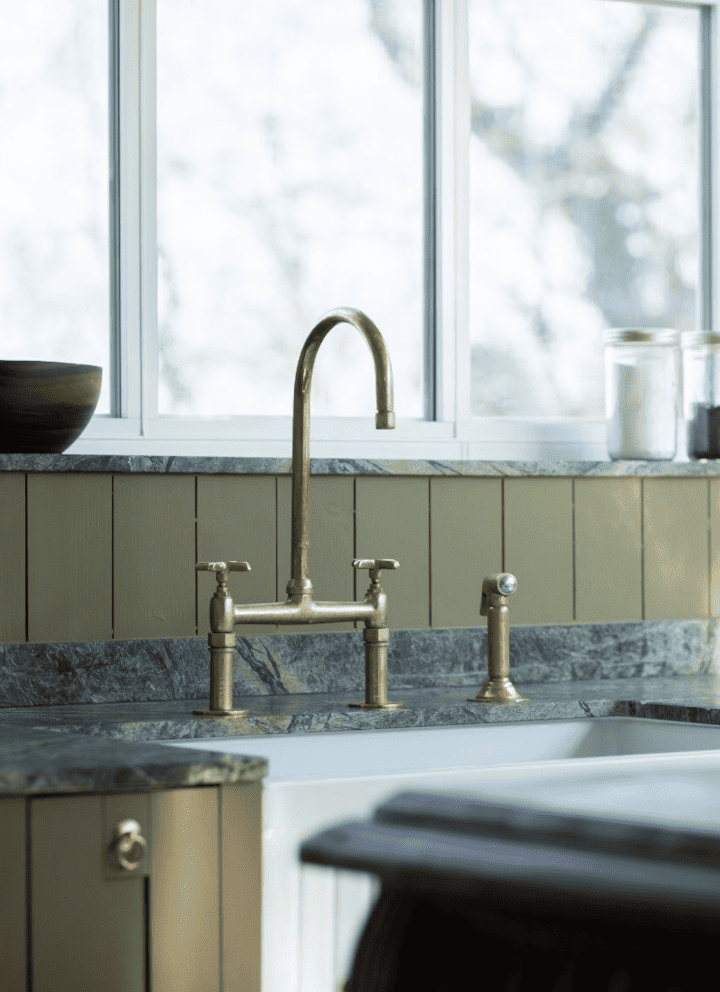
I also have had hardware picked out for some time so it didn’t take me long to settle on my beautiful unlacquered brass hardware from Rejuvenation.
Painting Cabinets
Here are a few shots of the original kitchen cabinets before painting!


It’s a job many people will do once or twice in a lifetime but let’s be real: It’s boring and a little tedious. I’ve painted kitchen cabinets before and know that if you don’t have the right tools and preparation, the project can drag on for weeks.
This time, I decided we needed to spray the cabinets due to the time constraints. We borrowed a friends high-quality paint sprayer and got to work.
We removed the doors, hinges, and hardware and did a light sand to remove dings and bubbling paint.

Next we gave all the cabinet doors a good spray with Kiltz spray paint.
NOTE: If you are planning to remove or change hardware, be sure to fill the previous hardware holes with wood filler and then sand. We also assessed the bases of the cabinets and sanded all the surfaces with fine grit sandpaper for a smooth finish.
After we applied Kiltz to all the door surfaces, we began spraying the cabinet doors. We used a different process with this paint job than we had in the past (I’ll share below) and it was SO much easier!
Easy Hack To Spray Cabinets Doors Faster and More Evenly:
We began by running a line of twine across our basement workshop where we planned to spray the cabinet doors. Then we used our drill to drill 2 small holes into the top edge of our cabinet doors.

Next, we screwed cup hooks into the holes in the doors and hung the doors on the twine line in the workshop. This may seem like a lot of work just to hang your cabinet doors, but attaching the cup hooks only took a few minutes and the ease of this process is totally worth it!


This process allowed us to paint all surfaces of the doors without having to wait for one side to dry, etc. It also sped up the dry time and avoided any knicks or creases. We will totally use this process again!
After all the doors were painted, we sprayed the cabinet bases.

After we finished all the painting, we attached our new hardware.
I chose ball knobs for the upper cabinets and drawers. I wanted to have a mixture of hardware looks so I chose vintage-style latches for the lower cabinet doors. Lastly, I selected cup pulls for our pull-out garbage cans.

I’m absolutely in love with my new cabinets! They look so soft and beautiful in this cottage-style kitchen. I can’t wait to finish the painting next week to see the full effect.
Counter Tops:
The charming 1940s kitchen had bright red butcher block counters when we moved in and after this week, they are now a beautiful neutral wood shade. I am SO happy and honestly amazed that we were able to neutralize the strongest red varnish known to mankind.


After a lot of research, I decided the best option was to bleach the countertops to see if we could lift the red shade out of the wood.
PRO TIP: If you aren’t sure if you have a true red-toned wood OR just a red toned stain, wipe the wood down with a wet cloth after giving it a good sand. Red wood may appear neutral when sanded down but once it is wet, you will see the red undertones! If you simply try to add a stain over a red wood, you will end up with pink undertones. The only way to truly neutralize the wood tone is to bleach it!
To start, I used my orbital sander to remove the top coating of the entire countertop.

The sanding process was quite tedious and I’m thankful I did this before we moved in because there was a heavy coating of red sawdust EVERYWHERE. If you have a belt sander with a dust collector, this can help to eliminate some of the residue. I love my Ryobi orbital sander! Make sure you wear a mask, eye protection and keep your space well-ventilated. I also recommend using tack cloth or plastic sheets to cover any surface you don’t want to wipe down later.
I started with a heavier git of sandpaper to remove the varnish and then scaled down to a very fine grit (220) to get a nice smooth finish.
My counters had such a thick coating of varnish that even after sanding multiple times, I still had areas that were super dark and shiny.

You can see in this picture, I tried to apply bleach to this section of counter and when I returned the next morning, the bleach was only able penetrate half the counter. This is a good indicator that your wood isn’t stripped down enough. I decided to use Citristrip to ensure all the varnish was removed from my counters.


I have used Citristrip multiple times before and it works like a charm to remove paint or stain.
To use Citristrip, be sure you have proper protective equipment and work in a well-ventilated space. I used a paintbrush to apply a thin layer of Citristrip over the whole surface. You can leave it on for a few hours or overnight. I ended up leaving it overnight so I made sure to cover it with a layer of plastic wrap. The next AM, I used a plastic scraper to remove the Citristrip. Then I carefully wiped the entire surface with (diluted) mineral spirits to remove the residue and then wiped the surface again with a damp cloth.

After this whole stripping + sanding process my counter looked like this:

Obviously less red than before, but you can still see the very red undertones of the wood!
The next step was to begin the bleach application process.

After doing a lot of research about the best options for bleaching wood, I decided on this wood bleach. It’s very effective and affordable!
To start, I poured both solutions (labeled A and B) into individual containers and placed a sponge in each container.
Using the sponge, I applied a smooth even layer of solution A, working down the countertop in the direction of the grain. You want the sponge to be saturated with the solution but not so saturated that it leaves puddles of bleach on the counter. After applying solution A, I let it set into the wood for 5-15 minutes. (5 minutes for softwoods, 15 for hardwoods- I left mine on for 15)

Do not wipe the solution off. After 15 minutes, apply solution B on top of solution A in the same way, along the grain of the wood. You should notice the wood grain already slightly starting to lighten after the first coat. I left solution B on the wood overnight.

This whole process sounds so straightforward… But how much the wood lightens REALLY depends on what type of wood the butcher block is! My counters lightened after 1 coat of bleach but definitely needed more.

Most counters should only take 2-3 coats of bleach, but mine took about 8 coats to really get the wood to lift. After each coat of wood bleach dried, I gave it a good sand with fine grit sandpaper, vacuumed the residue dust up with my shop vac, and then applied another coat.
After I finished the last coat of wood bleach, I gave the entire counter a really good sand with my power sander. The counters looked like this:

Next, I applied a coat of Pre-Stain Wood Conditioner, let it dry and then it was on to the fun part: staining these coutners!
For my counters, I chose to do a combination of Simply White by Minwax and Special Walnut by Minwax.

Both of these are oil-based stain options. I wanted to neutralize the last bit of red tone in the butcherblock but also NOT have a streaky white-washed look. (If you know me, you know I’m NOT a big “rustic” person. I don’t like streaky/chippy finishes. For this reason, I was nervous about using a “pickling” stain). But truthfully, the whitewash stain is one of the BEST ways to hide any remaining red tones in the butcherblock after bleaching.
PRO TIP: I tested a section of the countertop with multiple stain combos to see what looked best with my unique wood type. I noticed that using special walnut without the whitewash stain basically turned the counters TOTALLY red again. Make sure you really test your stain combo to find the perfect shade!

I ended up using a 3:1 ratio for Simply White and Special Walnut + 2-3 drops of green acrylic paint. The green paint helps to neutralize the red tones.
Here is the exact measurements I did:
- 100 MLS Special Walnut by Minwax
- 300 MLS Simply White by Minwax
- 3 drops of green acrylic paint.
This created enough stain to do over 3 coats on my butcherblock + have a good bit left over. After applying 3 coats (allowing 2 hours of dry time between each coat), I let the counters dry overnight.

NOTE: The Simply White stain goes on a bit like paint. After using a brush to apply the stain to one section, I immediately rubbed it in with an absorbent cloth. If you don’t rub the stain in quickly, it can have a streaky finish.

After allowing my stain to totally dry, I was ready to seal my countertops.
There are many different products to seal butcher block counters. I wanted a very durable sealant that I wouldn’t have to replace anytime soon, wouldn’t fade and would stand up to the usage a family of 5 creates.
After a good bit of research, I decided the best sealer would be triple-thick polyurethane in a satin finish. It is extremely durable and conducive to the heavy use a large family creates. It also dries in a very nice satin/matte sheen that doesn’t enhance or add to the color of the counters. Plus, the triple thick option means that only 1-2 coats are needed.
NOTE: Poly finishes aren’t “food safe”. If you plan to cut and prepare food right on your countertops, don’t use it! We always prep and cut on a cutting board and avoid food preparation right on the counters, so it was a great option for us.
The polyurethane is dry to the touch after 2 hours. I ended up doing 2 coats of polyurethane, making sure to do a light sand between coats. After 24 hours the counter is approved for light use, but the poly continues to cure for 7 days. I REALLY recommend avoiding letting ANY water or liquid touch your counter until after the 7 days. I got some splash marks that set in around day 2 and I really regret not letting the counter TOTALLY cure.
I can’t believe these are my counters now! I seriously smile everytime I come in this kitchen. I love how much more neutral with finish is and how well it meshes with my mushroom cabinets! Look at this before and after in this following picture!

So that brings us up to this week!!! We now have stunning neutral color countertops, and beautifully freshly painted mushroom cabinets + new hardware.
Here is the plan for next week:
- Paint the beadboard Natural Cream by Benjamin Moore
- Paint the walls Alabaster by Sherwin Williams
- Patch uneven areas on the wall and install sconces by the window
- Paint the interior window frames black

Be sure to check out all the other fantastic contributors to the ORC Spring 2024 here!